Showing posts with label kristin. Show all posts

Monday, August 26, 2013

Welcome Back to School

Hello everyone! I hope you are all doing well. School started today and I am so looking forward to getting to know my new batch of 3rd graders! Here's a little classroom tour--picture quality isn't great, but you'll get the idea!


Welcome to Mrs. O's Room. Flight 222 is now boarding.
Boarding passes included!
Entering the room.
Our classroom jobs. More on that later!
Our classroom rules. SOAR.


Library
AR board--Students move clips up and down
 the cloud ribbons to indicate points.


Room view turning to the right.


We're off to a great start!

Monday, July 8, 2013

Oatmeal Chocolate Chip Cookies

Hi everyone! Ashley and I have been super busy this summer. Ashley has moved and gotten a dog! I have gone back to school! There's a lot going on these days, but in case you haven't noticed based on all my previous posts involving chocolate, I'm never too busy to make cookies.


Ingredients

  • 1/2 cup rolled oats, regular or quick
  • 2 1/2 cups all-purpose flour
  • 1 1/2 teaspoons baking soda
  • 1/2 teaspoon salt
  • 1/4 teaspoon cinnamon
  • 1 cup unsalted butter, softened
  • 3/4 cup firmly packed brown sugar
  • 3/4 cup granulated sugar
  • 2 teaspoons vanilla extract
  • 1 teaspoon lemon juice
  • 2 eggs
  • 3 cups semi-sweet chocolate chips

Instructions

First: Heat oven to 350 degrees. Put rolled oats in blender or food processor and process until finely ground. Combine ground oats, flour, baking soda, salt and cinnamon in a mixing bowl.


Then: In another bowl, cream butter and sugars together with an electric mixer. Add vanilla, lemon juice and eggs and beat until fluffy.

Next: Stir the flour mixture into egg mixture until blended. Fold in the chocolate chips.  Use a spoon to help scoop round balls and place 2 1/2 inches apart on baking sheets.


Finally: Bake about 11-14 minutes. 


These were so delicious I forgot to take a picture before serving them. I think it's the oats and cinnamon together. Maybe the lemon juice? I have made these twice and the first time I put the oats through the food processor to make a fine powder out of it.  The second time I left them whole.  This changes the texture of the cookie for sure and mildly changed the taste of it. It somehow was less oat-y tasting when the oats were powdered. 


The only weird thing I experienced was that they didn't flatten as much as I expected. They turned out kind of thick and puffy.  So look out for that when rolling your cookies. You may want to flatten them with a fork or your thumb just a little before baking. Any advice about how to avoid this? I like my cookies less cake like generally. Have you ever tried chocolate chip cookies with cinnamon? With lemon juice? Give these a try and tell us what you think!

Saturday, March 23, 2013

Classroom Stations

Happy Saturday, everyone!

As we approach EOG testing season my mind is running with fun and creative ways to prepare students for their big tests. As teachers, one of our biggest challenges is to balance test taking strategies with fun, engaging learning experiences. One of the best ways I have found to do this is through stations.

Station activities allow students to be practicing skills in areas they need most help with, while their neighbor is practicing a skill he needs most help with. It's completely differentiated. Differentiation is a fancy word that is supposed to mean "developing a framework in which students can explore different venues of learning to grow academically regardless of culture, language, socioeconomic status, gender, motivation, personal interests and ability." In teacher speak that means, "I have a lot of work to do!"

Solution: Stations that require very little monitoring!**


Ok, so they aren't the cutest things yet. I quickly threw this together in an afternoon of frustration trying to grade hundreds of stations checklists and papers.

The main idea is this: There are several pocket charts on my bulletin board with labels of different kinds of stations. The students each have a dot with his or her number on it (all the kids have a number). They put their number beside the label they want to work with. They find the box with the matching label, take it to their seat or a spot around the room, and dig in! I tried to put tasks cards with word problems and a game or two in each box. The boxes on the right are sitting in 2 sideways turned milk crates. the top basket has math games. The blue box is full of math based learning books and the yellow box has dry erase markers, spray bottles, expo markers, and socks (erasers) in it.  All the materials are at the children's fingertips.

So how does it work? Here's my daily math schedule:
Paper passers hand out stations folders. In each station folder, there is a stations checklist, a piece of notebook paper, and the number dot.

Once students have their folder, they answer a word problem from the board (Problem of the Day). This is what the notebook paper is for. The students copy the problem and use their testing strategies to find keywords, underline important information, solve and check the problem.


As each student completes the problem of the day, he or she can take their dot, place it on the stations board, grab a station, and get to work. As other students finish, they can choose to put their dot next to another and work with that person, or get a completely different station to work with.

Students work in stations alone or in partners. I've found that little people have a hard time remaining friendly in groups of 3 or 4.  Station time from start (problem of the day) to finish (clean up) is 30 minutes. I set a timer so that students can self monitor.


What does the teacher do during this time? I pull 3-5 dots and have those kids work with me. We work on word problem strategies, go over past tests, or I reteach something I know that particular small group didn't understand.

When the timer goes off, the students clean up their stations and return to their seats. They pull out their stations check list, and write the name of the person they worked with next to the station they worked on. If they worked alone, they can write their own name. Each station has 3  boxes next to it. This limits the amount of time a child can go to each station. So...little Billy might want to play on the ipad every day, but he only has 3 chances. Eventually he has to work on each station because he will run out of other options.


We then go over the problem of the day, our daily warm up (morning work), and homework. As students put their homework in their mailboxes, they return their stations folder to the station folder box.
Now we are ready for Teacher Directed Instruction!


It seems like a lot of work up front. It took me 1 planning period to organize this whole set up. I love it because the students are learning responsibility because they have to monitor their work. They are also intrinsically motivated to participate because they get to choose the station they work on each day.

For students who are not following instructions or are not completing tasks, I assign them a station. Choice is a privilege and if you can't choose wisely, you don't have to choose. Only a few students have needed "help" choosing a station. After watching their friends learning together while they do something "boring" like seat work alone, they usually straighten up.

Most of my stations are games, but to monitor the paper work, I have a "turn in station work" box. At the end of the week I glance through the work and mark any glaring misunderstandings.

If you're a teacher, maybe you can try this in your own classroom! If anyone wants my problem of the day powerpoint, just e-mail me (newbeginningz2012@gmail.com). I'm happy to share. I'm also willing to share more details about what goes in each station box and send you task cards and things I have made!

Whew! We made it through that long post! Thanks for hanging in there with me. What about you? How do you make learning fun for your own kids (as a parent or a teacher)?


**With an effectively trained group of children. Good luck.

Thursday, March 14, 2013

Easy Sweet Potato Chips

It's a double feature! I didn't post last week, so I am sharing two posts today!

This is such a simple snack. We love sweet potato chips!

Ingredients:

Butter or Olive Oil
Salt
1 Sweet Potato.

Peel and slice your sweet potato into 1/4 inch disks. I used a cooking mandolin to slice mine really quickly. If you are handy with a knife, you definitely don't need one to make this recipe work--I just find it really simple to use!


Lay sweet potato slices on a cookie sheet. Brush with butter or oil. Sprinkle on salt. Bake about 10 minutes at 400 degrees. Use spatula to flip potatoes over. Brush this side with butter or oil and sprinkle with salt. Bake at 10 minute increments until chips are browned.


It's ok if some of them are a little black! They still taste great!


Serve with ketchup!


We enjoyed them salty this time. Next time I'd like to try sprinkling them with cinnamon sugar and drizzling them with honey!

Gluten Free Granola Bars

Hello, everyone! As I continue to experiment with and learn about gluten-free options, I have realized that being gluten-free is not easy. Since this blog is about two friends learning about life and finding ways to make growing up (no matter your age!) easier, I've debated sharing my gluten-free struggles/recipes. These types of things are a bit more complicated than crock pot dinners and DIY necklace stands. However, if like me, you are struggling with dietary issues, then maybe a post just for you can help make YOUR journey through life simpler.

With that in mind, I bring you--GLUTEN FREE GRANOLA BARS.  A friend shared this recipe with me and it has made breakfast a simple morning pit stop, rather than a huge ordeal.  I have a kitchen-aid mixer (thanks, Grandma!) and whipped these bars up really quick, thanks to that handy thing!


Ingredients:
1/2 c. butter
1/4 c. honey
1/2 c. brown sugar
1/2 tsp. salt
2  1/2 c. oats
1/2c.  rice krispies
1/4 c. coconut
1/2 c. choc. chips (or other add ins)


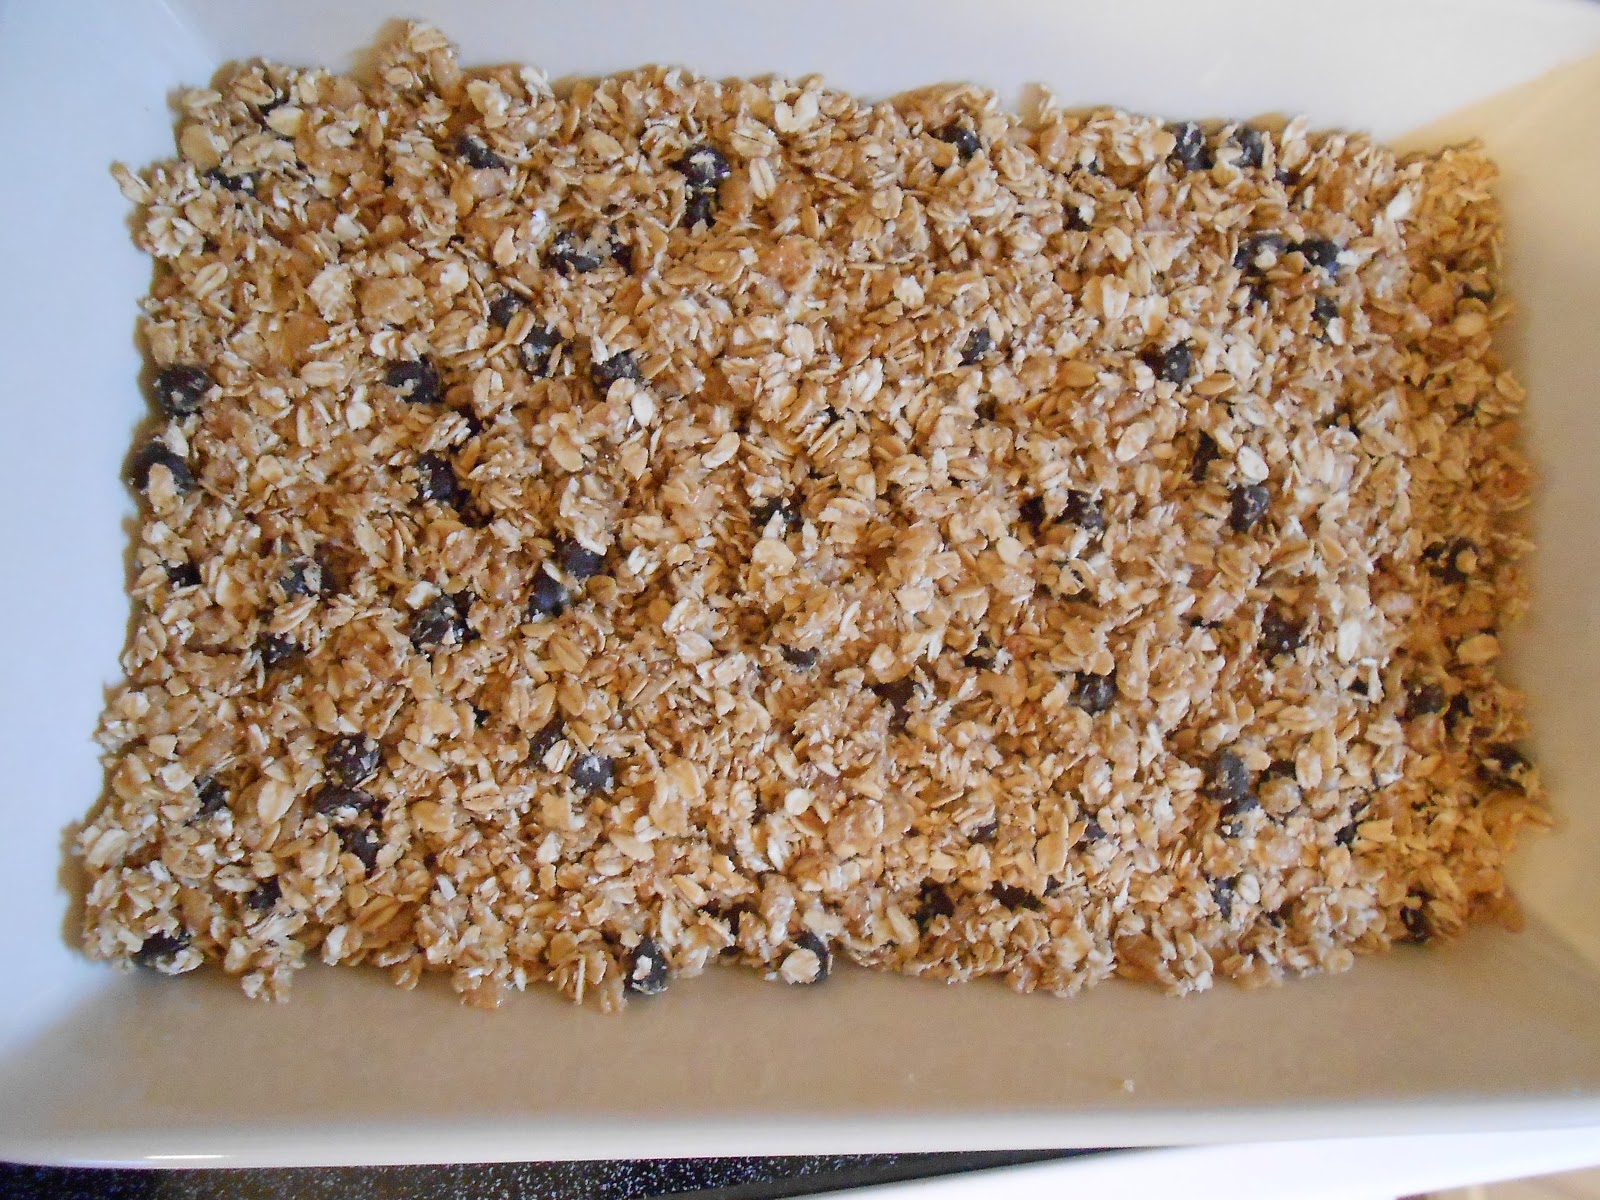
Steps one and two: Cream butter, honey, brown sugar, and salt. Then mix in oats, rice krispies, coconut, and chocolate chips.

I went to Whole Foods where my great friend, Brandon, helped me find everything I needed to make these bars. The only ingredients I already had were butter and salt. My ingredients totaled $30.00. "What? That's so expensive!", you may be saying. However, most organic granola bars are about $6.00/6 pack. These ingredients yielded 12 bars in this batch, and I have enough of everything leftover to make about 5 more batches (I'll have to supplement oats @ $1.00/lb.) That's 60 bars for $35.00, as opposed to 60 for $60.00. Don't forget--you could use coupons or buy in bulk. Also, these are gluten free, organic, and fair trade! Good for your wallet, your body, and the world!


Steps three-seven: Mix well. Press into a 9x13 pan. Bake at 325 for 18 minutes. Let cool about 10 minutes and cut into bars. Let cool completely in pan.

Tip: I did not use a 9x13 pan and that increased my cooking time. Look for your oats to be well browned and easy to cut. If they are really falling apart when you try to cut them into bars, they have not cooked long enough. 

These are the raw, pressed oats. Make sure they are very brown before removing them from the oven!


Remove and enjoy!

Saturday, March 2, 2013

Gluten-free Chocolate Chip Cookies

Happy Saturday, everyone! I'm taking a break from rearranging our furniture (why I can't I just chill on Saturdays like a normal person?) to tell you about some awesome cookies. The recipe only has a few ingredients...and the best part is: they are gluten-FREE! I haven't been feeling well lately (and by lately I mean in a long time). I decided to cut back on gluten and see what happens. So far I am feeling much better!

For me, one of the hardest things about cutting out gluten is missing out on so many desserts! These cookies were so delicious. I just have to keep them on hand all the time now. You can find the original recipe here.

Ingredients:
1 cup creamy peanut butter
3/4 cup sugar (I only used about 1/2 cup.)
1 large egg
1/2 teaspoon baking soda
1/4 teaspoon salt
1 cup semi sweet chocolate chips (I chopped up a fair trade chocolate bar.)


Baking Instructions:
Preheat oven to 350 degrees.
Mix everything except chocolate together until well blended.
Stir in chocolate chips.

Drop dough balls onto cookie sheet about 2 inches apart. I don't like how fat PB cookies stay if you don't smash them down, so during this part of the recipe I used a fork to cross hatch my cookies.

Bake for 12 to 14 minutes.

Cool, eat, enjoy.

Thursday, February 21, 2013

3rd grade is....always good for a laugh

This blog is all about how we are learning to be married, home-keepers, teachers, cooks, and grown ups. I think one of the hardest things about being an adult is being responsible and thoughtful without letting the burden of being responsible and thoughtful weigh you down. And let's face it--no matter what kind of job you have, sometimes (or maybe most of the time) work just feels like work! Who knew? One of the ways I combat my job making me feel like I'm being dragged from a rope tied to a galloping horse is to find some simple thing in it that brings me joy. Lucky for me, I work with kids. And anytime you need to find joy in working with kids, just take a moment to interview a couple of them. The 30 seconds it will take provides some of the most genuine laughter!

I asked my class to complete the following phrases:

Never look a gift horse....
Don't bite the hand...
The grass is always greener...
No news is...

Here are some of the responses:

Don't bite the hand that has a scab on it.

Never look a gift horse in the eye.

Don't bite the hand of a genie.

The grass is always greener than the road.

Don't bite the hand of your friend.

The grass is always greener when there's food coloring on it.

Don't bite the hand in the palm.

The grass is always greener than me.

Never look a gift horse in the face unless it is yours.

Don't bite the hand. It will be nasty.

Grass is always greener when it its taken care of.

Don't bite the hand, it will hurt!

Never look a gift horse in the price tag.

Don't bite the hand, look at the hand.


I feel renewed already! Who doesn't want to work with these comedians?

What do you do to take the edge off a hectic work day?

Sunday, February 17, 2013

Dinner time!

Hey everyone! I apologize for my delay in posting. Our goal is 2 posts per week and I completely dropped the ball. Maybe the deliciousness of the recipe below will help you forgive me. Please?

Today's easy recipe requires very few ingredients and is very simple. I will say, though, that unlike other simple recipes we post, this is not one where you can pop it in the oven and forget about it until it's done. So maybe this is more of a medium difficulty recipe versus an easy recipe.  I found it on Martha Stewart's webpage. You can click the link to see her original recipe.

Ingredients:

4 Potatoes
1 lb. Asparagus
1 lb. Chicken (I used about 5 chicken tenderlions. You could also use chicken breast, chicken legs, or multiple parts of a whole chicken!)
Butter
1 Lemon
Thyme (fresh sprigs are preferable but I just used my dried kitchen spices.)
Step 1: Preheat oven to 475. Peel and quarter (cut into 4ths) potatoes, cut ends off of asparagus, slice lemon into wedges, thaw chicken.

Step 2: Layer potatoes and a small slice of butter in pan. Season with salt and pepper. Bake for 20-25 minutes (until potatoes are golden brown).

Step 3: Remove pan from oven. Add chicken over potatoes.  Season with salt and pepper. Bake for 20 minutes (until chicken is golden brown).

Step 4: Remove pan from oven. Add asparagus, lemon wedges, and a small slice of butter over the chicken. Season with thyme. Cook for 5 to 15 minutes, or until asparagus is tender. Serve with butter and lemon juices from pan sprinkled on top.

This was delicious and very easy--my only dislike about this recipe is that it's more difficult to make while multi-tasking, since you have stop every 20 minutes to add the next layer of food.

Enjoy!


Friday, February 8, 2013

Easy No Sew Curtains

Good evening, everyone! Tonight I am going to show you how to create curtains with no sewing. I'd rate this project in a couple of ways:
Skill Level-Easy
Time Needed-Moderate
Price-That depends--do you already have a ton of fabric? If yes, it could be free!

Here's what you need:
Scissors
A straight edge
An iron
A tape measure
A hot glue gun
Lots of hot glue gun sticks
Lots and lots of fabric

About a year ago, before I got married, I was inspired by Nate Berkus to "upholster" my walls. The idea is that if you are renting a home and can't paint the walls, you can always cover the walls with fabric. Liquid starch acts like glue, holding the fabric to the wall. When it's time to move, you just wet the fabric and the starch is neutralized. It's supposed to peel right off! As you can tell by the language of that sentence, I don't know if it peels right off. I never did the project. I did, however, START the project by buying lots and lots of fabric ($$$). When Doug and I got married and moved, the never-used fabric needed a project. I decided to make a curtained wall panel behind our bed, like a faux headboard, with matching curtains.  The main problem is---I can't sew. My sewing machine has been broken for about as long as I've had it.

NO SEW CURTAINS IT IS!

So...I started with a chevron print fabric I purchased online. It was a HUGE roll of some canvas-y type fabric. The roll (and fabric on the roll) is naturally 57 inches wide. I did not cut the sides of the fabric--I maintained the width completely so that I wouldn't have to finish the sides. One panel was plenty wide to cover a whole window.

Step 1: I measured our wall from floor to ceiling and decided that a 7 foot length panel would be plenty long. I added about 6 inches so I could fold the top down to create a loop for the curtain rod.

Here's where we are so far: 57 inch wide panels that are cut to be 7.5 feet long. I didn't know how crowded 1 panel would look on a window, so I cut 5 panels. I figured I could put 3 behind our bed and 2 over the window. We really only needed 1 per window, so I ended up with 1 extra panel. I eventually used the extra to create a "nook" in our hallway--more on that in another post!

Step 2: Lay panel on a flat surface backwards--you should be looking at the side that will be facing the window.  Fold top of panel down about 3-6 inches. I did 6 inches, but it wasn't necessary to have that much room for the curtain rod.

Step 3: Iron a crease into the fabric where you have folded the top of your curtain panel. I did this so that I wouldn't end up gluing the fabric in a crooked line.  If you are really good at eye-balling the measurement, you don't have to do this part!

Step 4: Hot glue the flap you've just folded down to the back of the main panel.

Step 5: If you want a really finished look, repeat this step on the bottom of the panel. I didn't, and the fabric I used hasn't frayed or started coming apart. I suppose the necessity of this part depends on the fabric you choose.

All that's left is to hang and enjoy! All in all this project took me about 3 hours. I'm a very slow measure-er and I'm terrible at cutting straight lines. I moved very slowly to ensure minimal mistakes!

The panels behind our bed.

The curtain covering the window--and bonus! The necklace holder from one of our first tutorials!


Thursday, January 31, 2013

Imitation Low Country Boil Recipe

Hello, folks! Today we're bringing you another quick and easy recipe!

Here's what you need to get started:
Shrimp: peeled, deveined, cooked
Sausage: the long tube kind, not the kind that looks like ground beef
Potatoes (as many as you feel like eating. On this occasion I used 4--2 medium and 2 very small.)
Cajun Seasoning
1/2 stick Butter
pinch of Salt and Pepper
1/4 Onion
optional: Corn, Peppers

To prepare:
Chop the onion into desired size pieces. I don't like biting into a huge chunk of onion so I cut mine fairly small.
Slice sausage into disks. I usually aim for disks about half an inch thick.
Peel and chop potatoes. I have several notes about this. 
1. You do not have to peel the potatoes if you like potato skins. I don't prefer it, but if you do--go ahead and leave it on!
2. If you use a less starchy potato, like a red potato, you will not get a mushy product. It will still taste great, it just won't look like the final pictures below!
3. The larger the potato slices, the longer it will take to cook. The size of the potatoes below had to boil about 10 minutes longer than usual because I left them so big.


To cook:
Dump all your cut up ingredients and the shrimp into a pot of water. 
Bring water to a boil.
Wait about 15 minutes.
To check to see if your food is done, pull out a potato wedge. Cut a portion off. If it is extremely soft, it is ready. You can also taste it. It should have the texture of...a potato. What's so great about this recipe is that the only portion that is not cooked is the potato and onion. You really only have to boil the ingredients as long as it takes to soften those two things up. The rest is already cooked--you're just heating it up!

Waiting for the food to boil. 
Once the potatoes are cooked all the way through, drain the pot into a colander.  Put all the food back in the pot. We still have to add butter and seasoning!

Add the half stick of butter and seasoning. I have no exact measurement for the seasoning--it's just to taste. I like to lightly cover the whole thing with a thin layer of seasoning. Then add a pinch of salt and pepper.

Finally, mix it all together, serve, and enjoy!


It's warm and delicious for these cold winter days. My husband hates soup so this is a great alternative for when I'm feeling like cozy foods!


Tuesday, January 29, 2013

Tree Branch Necklace Stand DIY

Hello, everyone!  Today's easy project was inspired by an attempt to organize my jewelry box. I wanted a way to organize my necklaces so that I would feel inspired to wear them.  I am a firm believer in trying to do things simply and inexpensively, and today's DIY is both cheap and easy! You won't even have to leave your yard!

For this Tree Branch Necklace Stand you will need only 3 or 4 things:
1. Several thin branches from a young tree or bush.
2. A vase
3.Necklaces
4. Rubberband/String/Twine (optional)

Step 1: Head outside and cut or break off several thin branches from a young tree or bush. I happened to have both, so I grabbed a couple branches from each plant.  Make sure you pull the leaves off the branches (or collect them in the winter when there are no leaves!).   Tip: You don't want to pull the leaves off in a way that will strip the branch. It's good for it to have little knobs or smaller branches coming off of it. Not only is it beautiful, the bumps and grooves help hold the necklaces in place.

Step 2: Arrange your branches in a lovely vase. It can be any size that is tall enough to support your branches. This is where the string/rubberband/ twine comes in. My vase has a wide enough mouth that the branches don't stand up well inside of it. If I gathered more I could possibly have enough that the branches could support one another, but I like the aesthetic of having just a few. Typing or banding the bottom of the branches help them stay clustered together, rather than drooping all around a wide mouth vase. Again, this stage is optional. If you have a vase with a small opening, or like the look of the branches sitting a little lower and being more spread out--you don't need to bind the branches.

Step 3. Display all your darling necklaces!


Happy DIY-ing!