Thursday, March 14, 2013

Gluten Free Granola Bars

Hello, everyone! As I continue to experiment with and learn about gluten-free options, I have realized that being gluten-free is not easy. Since this blog is about two friends learning about life and finding ways to make growing up (no matter your age!) easier, I've debated sharing my gluten-free struggles/recipes. These types of things are a bit more complicated than crock pot dinners and DIY necklace stands. However, if like me, you are struggling with dietary issues, then maybe a post just for you can help make YOUR journey through life simpler.

With that in mind, I bring you--GLUTEN FREE GRANOLA BARS.  A friend shared this recipe with me and it has made breakfast a simple morning pit stop, rather than a huge ordeal.  I have a kitchen-aid mixer (thanks, Grandma!) and whipped these bars up really quick, thanks to that handy thing!


Ingredients:
1/2 c. butter
1/4 c. honey
1/2 c. brown sugar
1/2 tsp. salt
2  1/2 c. oats
1/2c.  rice krispies
1/4 c. coconut
1/2 c. choc. chips (or other add ins)


Steps one and two: Cream butter, honey, brown sugar, and salt. Then mix in oats, rice krispies, coconut, and chocolate chips.

I went to Whole Foods where my great friend, Brandon, helped me find everything I needed to make these bars. The only ingredients I already had were butter and salt. My ingredients totaled $30.00. "What? That's so expensive!", you may be saying. However, most organic granola bars are about $6.00/6 pack. These ingredients yielded 12 bars in this batch, and I have enough of everything leftover to make about 5 more batches (I'll have to supplement oats @ $1.00/lb.) That's 60 bars for $35.00, as opposed to 60 for $60.00. Don't forget--you could use coupons or buy in bulk. Also, these are gluten free, organic, and fair trade! Good for your wallet, your body, and the world!


Steps three-seven: Mix well. Press into a 9x13 pan. Bake at 325 for 18 minutes. Let cool about 10 minutes and cut into bars. Let cool completely in pan.

Tip: I did not use a 9x13 pan and that increased my cooking time. Look for your oats to be well browned and easy to cut. If they are really falling apart when you try to cut them into bars, they have not cooked long enough. 

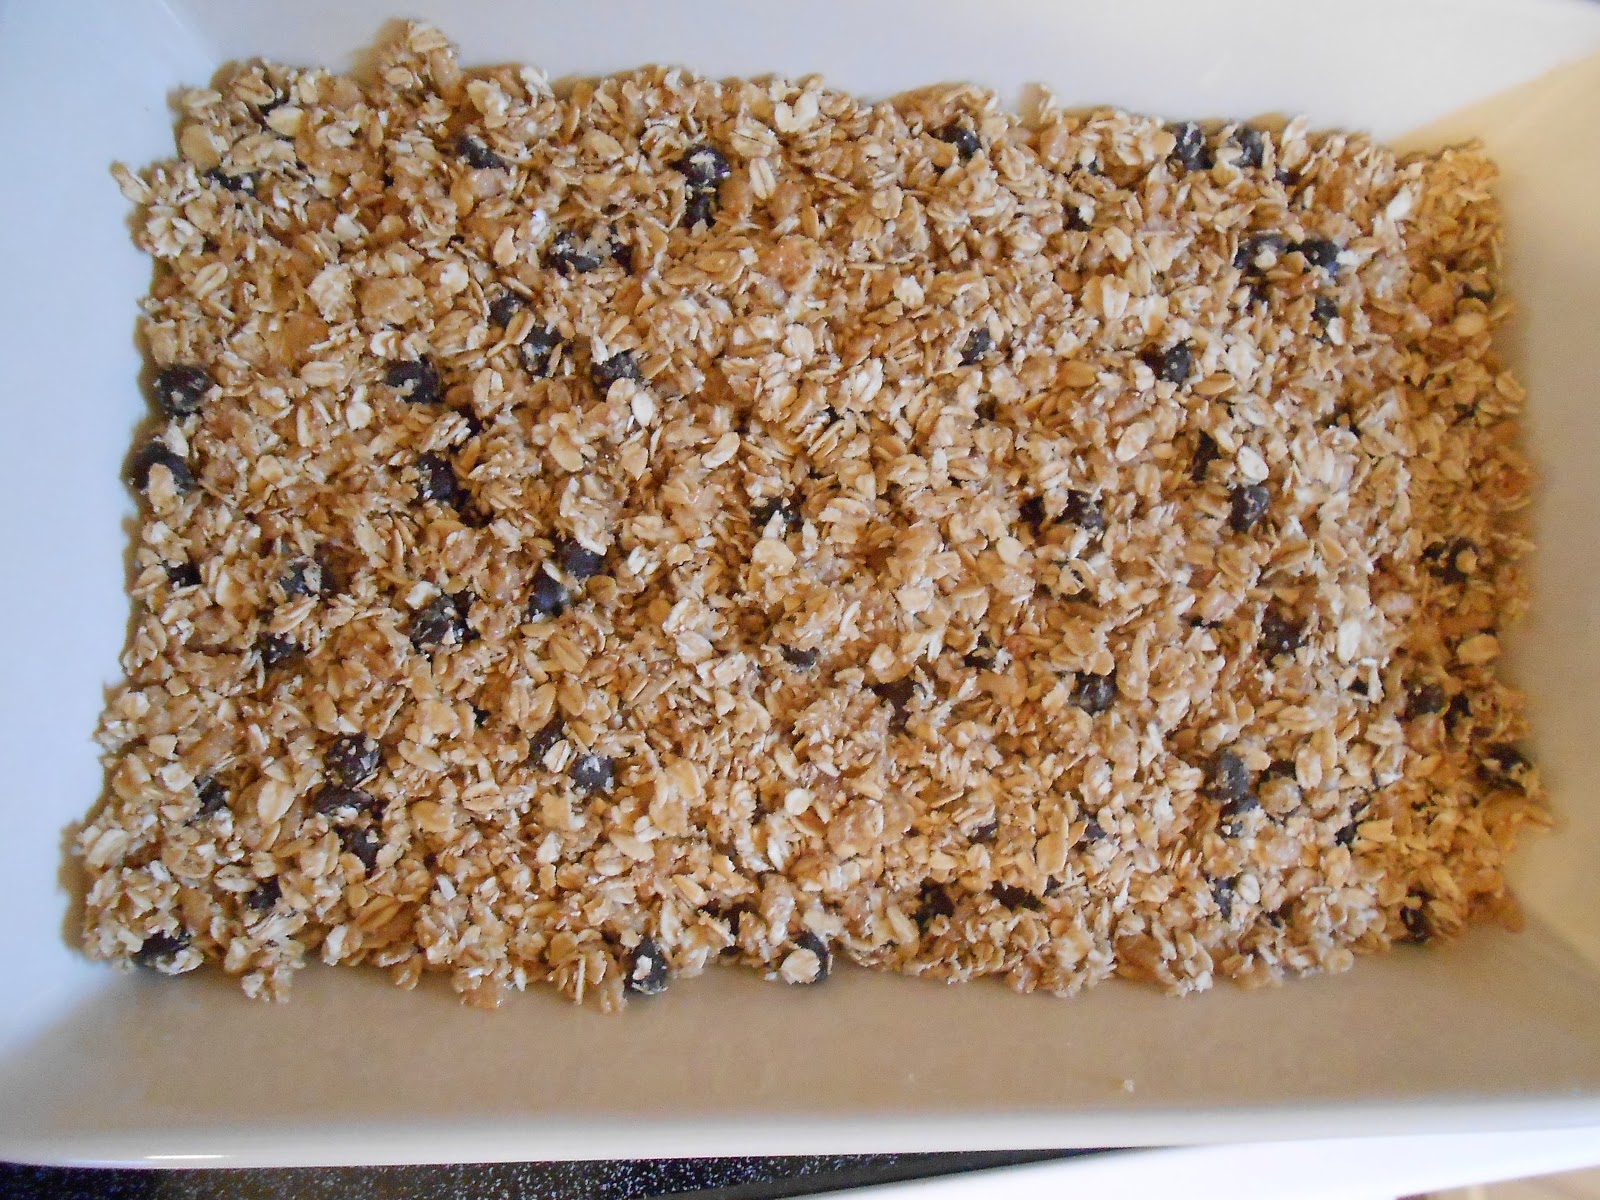
These are the raw, pressed oats. Make sure they are very brown before removing them from the oven!


Remove and enjoy!

Saturday, March 9, 2013

Easy as [mini] Pie | Mini Ham Pie Recipe

I [Ashley] am supposed to post during the first half of the week, but it has been one of those crazy weeks as a teacher and photographer, so I'm just happy that I'm posting at all this week!  I have a wedding to shoot tomorrow, so I might not be heard from for a week or 2 ;).  Tonight I'm sharing a super easy recipe that only has 4 ingredients.  I found a recipe like this on Pinterest here, and it was SO easy.

Ingredients:
1 tbsp Butter
1 uncooked pie crust
5 pieces of deli ham
1 cup shredded cheese [I used cheddar]


First, chop the ham into tiny pieces and mix with cheese in a bowl.  Then, use a biscuit cutter to cut the crust into circles.  Put a spoonful of ham and cheese onto each mini pie.
Fold over the crust and pinch the edges closed.  Melt the butter, and spread it over the top of each pie.  Follow the pie crust's baking directions.  Mine cooked at 450 for 15 minutes.

Enjoy with some green beans and mashed potatoes, or be weird like me and eat them with spinach and grapes ;).

Saturday, March 2, 2013

Gluten-free Chocolate Chip Cookies

Happy Saturday, everyone! I'm taking a break from rearranging our furniture (why I can't I just chill on Saturdays like a normal person?) to tell you about some awesome cookies. The recipe only has a few ingredients...and the best part is: they are gluten-FREE! I haven't been feeling well lately (and by lately I mean in a long time). I decided to cut back on gluten and see what happens. So far I am feeling much better!

For me, one of the hardest things about cutting out gluten is missing out on so many desserts! These cookies were so delicious. I just have to keep them on hand all the time now. You can find the original recipe here.

Ingredients:
1 cup creamy peanut butter
3/4 cup sugar (I only used about 1/2 cup.)
1 large egg
1/2 teaspoon baking soda
1/4 teaspoon salt
1 cup semi sweet chocolate chips (I chopped up a fair trade chocolate bar.)


Baking Instructions:
Preheat oven to 350 degrees.
Mix everything except chocolate together until well blended.
Stir in chocolate chips.

Drop dough balls onto cookie sheet about 2 inches apart. I don't like how fat PB cookies stay if you don't smash them down, so during this part of the recipe I used a fork to cross hatch my cookies.

Bake for 12 to 14 minutes.

Cool, eat, enjoy.

Monday, February 25, 2013

Baked Turkey Tacos

Difficulty Level: Easy Peasy


Ingredients:
1-2 lbs ground turkey [or lean beef...but then I guess they wouldn't be "turkey tacos"]
1 cup shredded cheese
1 taco seasoning packet [I use low sodium]
1 can Rotel diced tomatoes and chilies
1 can refried beans [I use vegetarian]
12-18 hard taco shells [1 box]


Cook meat.  Add beans, seasoning, Rotel, 1/3 cup of cheese.  Arrange shells in a baking dish [which is harder than I thought!]  Spoon in mixture and top with cheese.  Bake in a 400˚ oven for 10 minutes [or until cheese is melted] and ENJOY! Top with whatever you like to have on your tacos [tomatoes, sauce, lettuce, etc.]

They were super easy to eat, without the normal breakage and spilling of hard shell tacos PLUS super delicious!

Sunday, February 24, 2013

DIY | Organizing Personal Files


I think that I might be obsessed with Pinterest.  And although most of my pins sit there unclicked, sometimes I go all out and decide to go through with the ideas I find on the site.  The lasagna recipe was one that I found using Pinterest, and I LOVE finding lesson plans on there.  I recently found some organizing inspiration that took me to The Weekend Organizer.   She has some seriously amazing information about personal files, how long to keep them, how to organize them, and what's important or not.  As a newbie to the "real world," I've never had to keep up with important documents like  a lease, contracts, warranties, insurance information, marriage certificate, birth certificates [you get the point].  I have honestly not been very good at keeping these extremely important documents organized...I'm ashamed to admit that they have been tossed in the top drawer of my filing cabinet without a real home.  The Weekend Organizer uses a great color coded filing system using special hanging files that allow you to see your file folders.  It's so much easier to just make a new file folder than a new tab on a hanging folder.  I loved that idea, but I couldn't find the special "top rail" folders in a store, so when I got home I decided to shorten my hanging folders so that I could see my file tabs.  My first step was honestly not making the folders...my first step was going through my entire filing cabinet and organizing my documents by category.  I ended up with an entire trash bag of old and outdated files for shredding.  After that, I created my folders with the tabs labels, and THEN I could start the fun part! [making the new, shorter hanging folders]
First, you need to fold the hanging file inside out, and then use the lines on bottom to help you fold it out.  I folded mine out by 2 lines on each side on the bottom.
I will look like the file on the right.  Then, tape the bottom, and insert your folders!

You're done!

[Ps...my cute file holder is from Target, about 2 years ago!]

Pps...I did a whole "apartment storage ideas" post on my other blog HERE if you want to creep my house :)]

Ppps haha...I know that some of this should be in a safe...and some of it is.  I need a bigger fire-proof safe!

Thursday, February 21, 2013

3rd grade is....always good for a laugh

This blog is all about how we are learning to be married, home-keepers, teachers, cooks, and grown ups. I think one of the hardest things about being an adult is being responsible and thoughtful without letting the burden of being responsible and thoughtful weigh you down. And let's face it--no matter what kind of job you have, sometimes (or maybe most of the time) work just feels like work! Who knew? One of the ways I combat my job making me feel like I'm being dragged from a rope tied to a galloping horse is to find some simple thing in it that brings me joy. Lucky for me, I work with kids. And anytime you need to find joy in working with kids, just take a moment to interview a couple of them. The 30 seconds it will take provides some of the most genuine laughter!

I asked my class to complete the following phrases:

Never look a gift horse....
Don't bite the hand...
The grass is always greener...
No news is...

Here are some of the responses:

Don't bite the hand that has a scab on it.

Never look a gift horse in the eye.

Don't bite the hand of a genie.

The grass is always greener than the road.

Don't bite the hand of your friend.

The grass is always greener when there's food coloring on it.

Don't bite the hand in the palm.

The grass is always greener than me.

Never look a gift horse in the face unless it is yours.

Don't bite the hand. It will be nasty.

Grass is always greener when it its taken care of.

Don't bite the hand, it will hurt!

Never look a gift horse in the price tag.

Don't bite the hand, look at the hand.


I feel renewed already! Who doesn't want to work with these comedians?

What do you do to take the edge off a hectic work day?

Tuesday, February 19, 2013

DIY Radial Weaving

So for tonight's post I'm going to have a little "art teacher moment."  I think I've told several people that I would do a DIY on how I create these radial weavings with my kids, and I never have.  I made some of these for fun in my old apartment and made it into a lesson.

[Disclaimer...I know this isn't really "weaving," but whatevs]

For this DIY you will need...

To start off, you will want to cut a circle out of the chip board [I used a cereal box], and you will need to draw 16 evenly spaced lines on the back and label them clockwise:
After that, you will want to cut the little lines to create notches.
Then, measure and cut the yarn.  The amount will depend on how big your circle is.  I used about 4 arm lengths [stretching my arms out while holding the yarn].  If you run out of yarn before you finish, you can just cut more and tie it on.

Here comes the "fun" part! [sarcasm...it's a little confusing unless you're doing it.]

1)  Start by sticking the end of the yarn into the "1" notch.  Leave a little bit hanging to tie it up later.  You will be wrapping the yarn around the board from front to back.
2)  You will go from the 1 to the 8 around whichever side is the front.
3)  This is what the front looks like.
4)  Then go from the 8 to the 16 across the back, then the 16 to the 7 across the front [if you are doing this you will see a pattern]
I always look at the back the whole time because it's easiest.  On the back you will see the left image, and on the front it will look like the right image.  This is one rotation around the circle.  You will do exactly what you just did, starting with 1 to 9, 9 to 16, 16 to 8, etc. [Easier to understand if you're doing it!]  So go around the circle 2 times total.
Tada!  Turn it over and see what you made!
If 9 year olds can do it, you can do it!  Here are some by my students:
Here are some photos from my old apartment with my "rough draft" versions of these weavings [they are a little bit different, but practice makes perfect!]  Happy weaving!